PIK 20B: Difference between revisions
No edit summary |
No edit summary |
||
| Line 1: | Line 1: | ||
[[Category: Airplane]] | [[Category: Airplane]] | ||
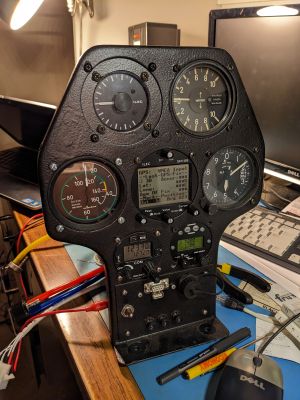
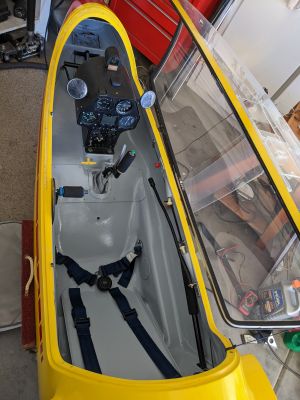
A buddy and I bought this for a good price out in Texas. It had been sitting outside under a shade for several years and needed quite a bit of TLC. I installed an SN10B computer and FLARM, a Becker 4201 radio and a MicroAir mode C transponder. I've slowly been improving/repairing stuff as time allows. | A buddy and I bought this for a good price out in Texas. It had been sitting outside under a shade for several years and needed quite a bit of TLC. I installed an SN10B computer and FLARM, a Becker 4201 radio and a MicroAir mode C transponder. I've slowly been improving/repairing stuff as time allows. The most recent project was a strip and repaint of the interior. | ||
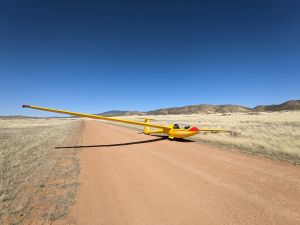
[[File:PXL_20220416_221601679.jpg|thumb|300px|After landing at Prescott Soaring]] | [[File:PXL_20220416_221601679.jpg|thumb|300px|After landing at Prescott Soaring]] | ||
| Line 7: | Line 7: | ||
[[File:PXL_20230127_193006008.jpg|thumb|300px|Interior after stripping and paint]] | [[File:PXL_20230127_193006008.jpg|thumb|300px|Interior after stripping and paint]] | ||
===Trailer=== | |||
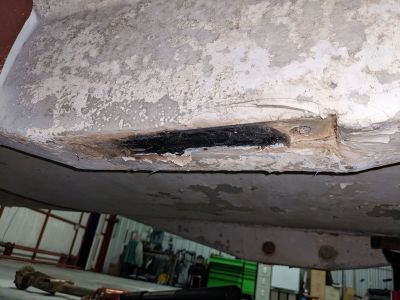
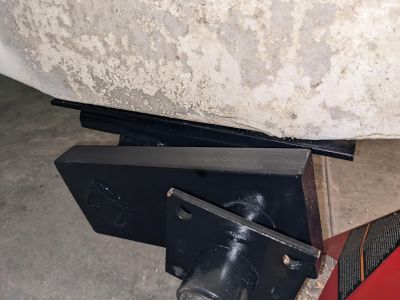
When we first got the glider, the trailer was not in great shape. I cleaned out all the mouse poops and re-wired the lights. After awhile I noticed the axle was coming loose from the trailer. The fiberglass where the axle sits was compressed in and generally looked bad. | |||
[[File:PXL_20230130_012934402.jpg|400px|Fiberglass on the trailer, not looking so good]] | |||
I ended up taking off the axle and putting some metal plates in between to spread the load over the whole area. | |||
[[File:PXL_20230203_023133418.jpg|400px|Axle after cleaning up]] | |||
I cleaned and repacked the bearings and put in all new studs. Since then, it has gone a couple thousand miles with no further issues. | |||
Revision as of 07:04, 30 September 2023
A buddy and I bought this for a good price out in Texas. It had been sitting outside under a shade for several years and needed quite a bit of TLC. I installed an SN10B computer and FLARM, a Becker 4201 radio and a MicroAir mode C transponder. I've slowly been improving/repairing stuff as time allows. The most recent project was a strip and repaint of the interior.
Trailer
When we first got the glider, the trailer was not in great shape. I cleaned out all the mouse poops and re-wired the lights. After awhile I noticed the axle was coming loose from the trailer. The fiberglass where the axle sits was compressed in and generally looked bad.
I ended up taking off the axle and putting some metal plates in between to spread the load over the whole area.
I cleaned and repacked the bearings and put in all new studs. Since then, it has gone a couple thousand miles with no further issues.
FLARM Bluetooth Adapter
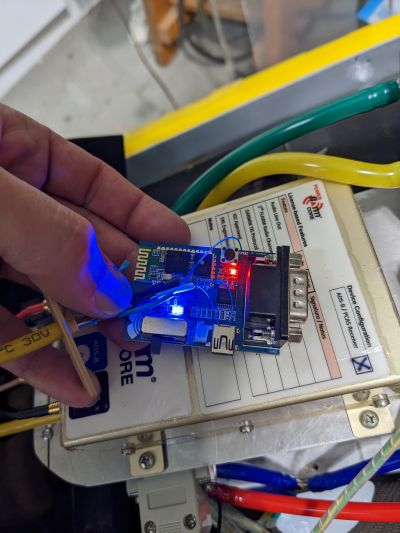
I built this so XCSoar can connect to the FLARM and display traffic, etc. It's a blk-md-bc04-b-demo board, which has a blk-md-bc04-b bluetooth module plus an RS232 level shifter on it. As of this writing you can still get them on eBay for $11. Link It's just perfect other than you have to adapt the FLARM 12v output to 5v to power the board. I meausured the current draw at about 20mA so you don't need a very big regulator. I dead-bugged a 78L05 onto it and 3d printed a case. The 5v output gets soldered onto the back of the USB mini jack. I cut a short piece off a network cable to connect it to the flarm rj45. I use the db9 to connect to the computer so the rj45 was free and unused in my setup. Carefully ohm out the rj45 connections, as we learned previously, flarm is easily damaged by miswiring! The rj45 is a separate serial port from the db9 and has to be enabled in the flarm config. The online flarm config utility can do this if it isn't already, enabling both I think is the default.
You have to switch the module to a higher baud rate - the way to do that is set the switch to master mode, power it up and connect to it with a PC. Default baud rate is 9600, you should see it print out some stuff when it boots. Send the following command to switch it to baud rate 5 (19200, the default FLARM rate)
AT+BAUD5
<replies with>
+BAUD=5
Then switch the PC to 19200 baud and make sure you can still talk to it - send AT <enter> and it should reply back. Now you switch it back to slave mode and it's ready to go.
